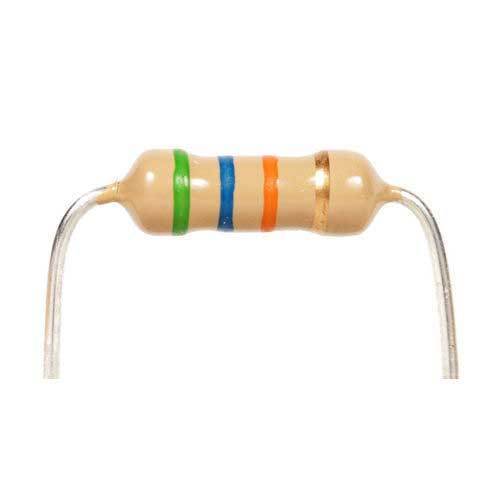
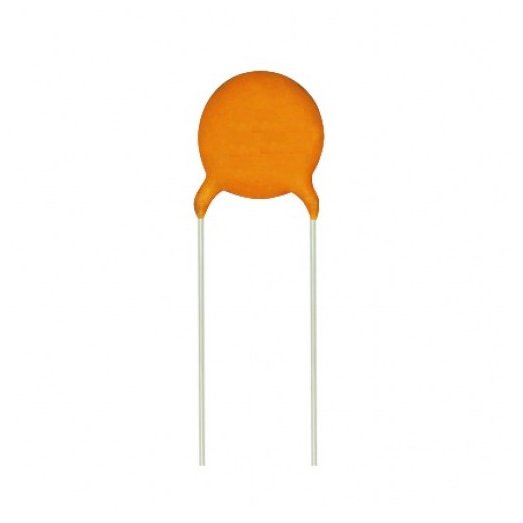
Lee's Electronic and Bare Conductive are collaborating once again to host a giveaway! This time one winner will win...
Store address and hours
location_on 4131 Fraser St. Vancouver BC Get Directions
phone 604-875-1993 Call us
access_time Hours
| Monday - Friday | 9AM - 5:30PM |
| Saturday - Sunday & Holidays | Closed |
| See Holiday Hours | |

-
 close
close -
CATEGORIES
-
-
-
-
-
-
-
-
-
-
-
-
-
Featured Items
-
-
-
-
-
-
-
More mirco-controllers
-
More Developement Tools
-
-
More Prototyping
-
More Modules
-
-
Featured Items
-
More prototyping Tools
-
-
-
-
-
-
-
-
Featured Item
-
-
-
-
-
-
-
Featured Items
-
-
-
-
-
-
-
-
-
-
Featured Items
-
-
-
-
-
-
-
-
-
-
-
Featured Items
-
-
-
-
-
-
-
-
-
Featured Items
-
-
-
-
-
-
Popular Cleaners
-
-
-
Featured Items
-
-
-
-
-
-
-
Featured Items
-
-
-
-
-
Featured Items
-
-
-
-
Featured Products
-
-
-
-
-
more motor
-
-
more power supplies
-
-
Featured Items
-
-
-
more electrical devices
-
-
-
-
-
-
-
Featured Items
-
-
-
-
-
-
BRANDS
-
- PROJECTS
-
COMMUNITY
-
-
-
FEATURED POSTS
-
-
-
- SALE
BattleDIP

Created by: Forbes Ng
This project is a good introduction to digital logic circuits as it will utilize basic concepts of Boolean logic and memory in circuits. You will be using chips such as a Dual D-Type Flip Flop, Quad 2-input XNOR gate, and Dual 4-Input AND gate that is all available in the 7400 series in both TTL and CMOS logic or also the 4000 series. Following similar principals from the classic game, Battleship, this game adds a time crunching element where each player needs to figure out the opponent’s code on the DIP switch before they figure yours’s out.
Parts You Will Need
- 8 x Dual D-Type Flip-Flop:
(74HC74 - Lee's ID: 71439) (74LS74 - Lee's ID: 7255) (4013 - Lee's ID: 7196)
- 2 x Quad 2-input XNOR (Exclusive-NOR) Gate:
(74HC266 - Lee's ID: 71762) (4077- Lee's ID: 7226)
Possible alternatives if XNOR chip is not available:
2 x Quad 2-input XOR (Exclusive-OR) Gate:
(74HC86 - Lee's ID: 71297)(4070 - Lee's ID: 7221)
2 x Hex Inverter (NOT) Gate:
(74HC04 - Lee's ID: 71684) (74LS04 - Lee's ID: 7241) (4069 - Lee's ID: 7220)
- 1 x Dual 4-Input AND Gate:
(74HC21 - Lee's ID: 71700) (4082 - Lee's ID: 7230)
- 1 x 5V Voltage Regulator (LM7805 - Lee's ID: 7115)
- 1 x 9V Battery Clip (Lee's ID: 6538)
- 1 x 9V Battery (Lee's ID: 83741)
- 3 x Breadboards (Lee's ID: 10686)
- 4 x Tack Switch (Lee's ID: 3122)
- 4 x 4-Position DIP switch (Lee's ID: 367)
- 32 x 10K Ω 1/4W Resistors (Lee's ID: 9284)
- 16 x 1K Ω 1/4W Resistors (Lee's ID: 9190)
- 6 x 110 Ω 1/4W Resistors (Lee's ID: 9102)
- 3 x 5mm Red LED's (Lee's ID: 549)
- 3 x 5mm Green LED's (Lee's ID: 550)
- Solid Wires (Lee's ID: 2249)
- Jumper Cables (Lee's ID: 21802)
Attachments
Step 1: Setting Up the Power Supply
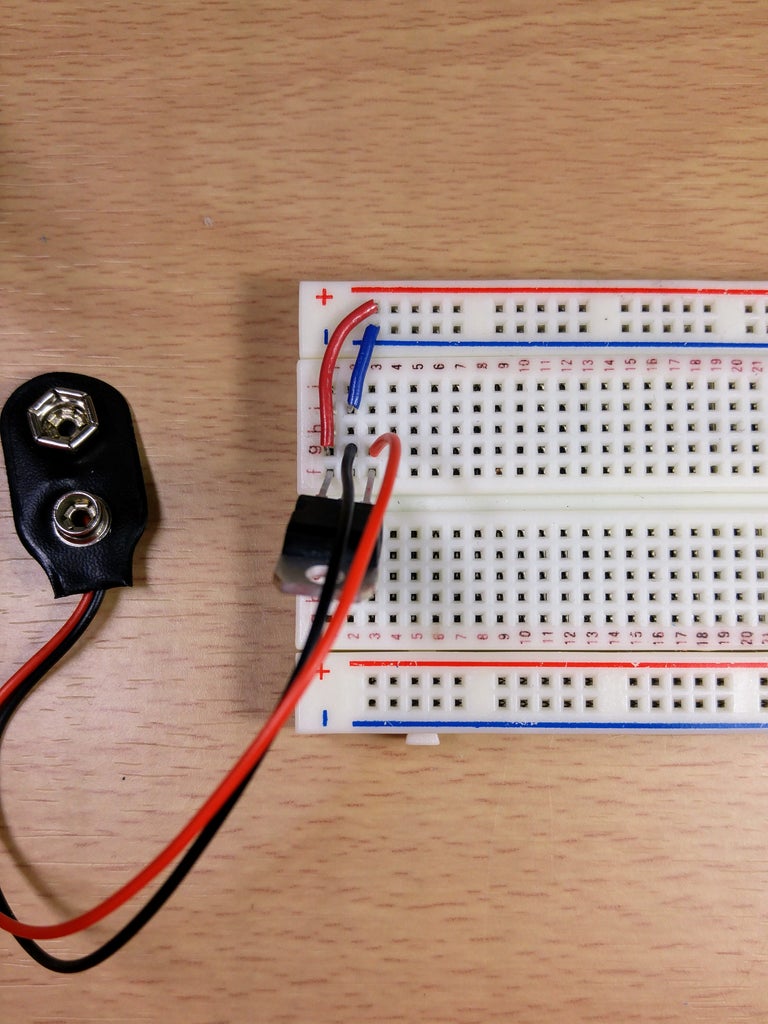
Place the voltage regulator (7805) in place. Put the red wire from the 9V battery clip in the same column as pin 1, and connect the black wire in the same column as pin two. Take a Solid wire and connect pin 3 to the power rail and another solid wire to connect pin 2 and the black wire on the battery clip to the ground rail
Step 2: Establish a "Clock"
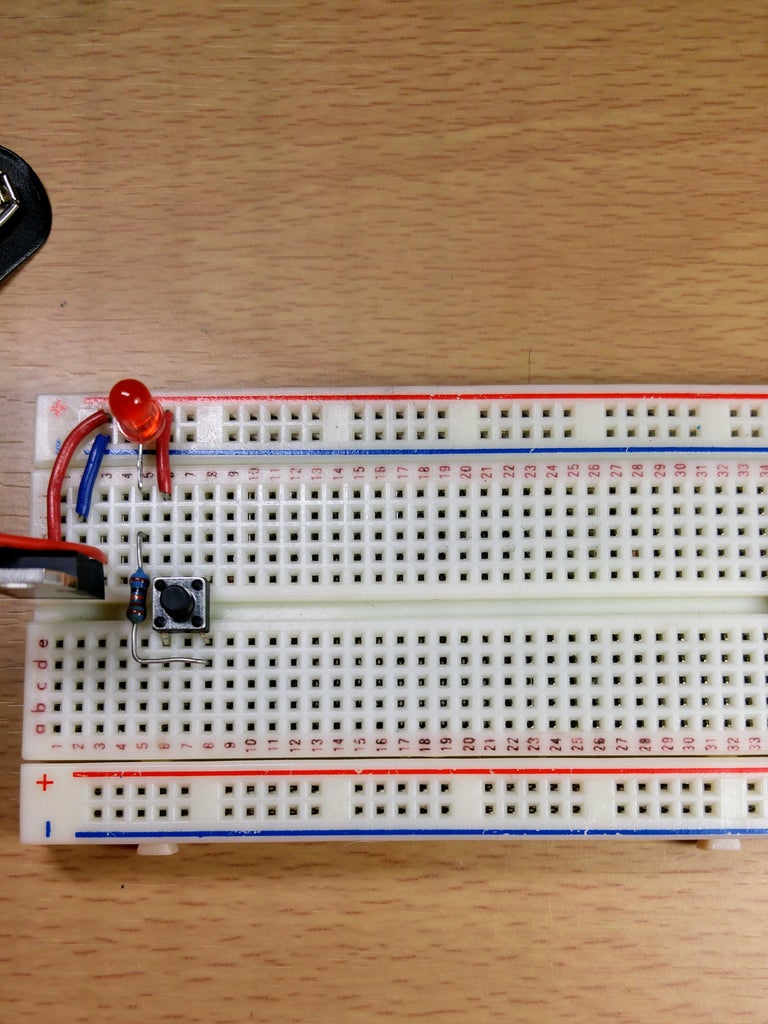
We will depend on the clock cycle of the Flip Flop to "set" our DIP switch pattern and "guess" our opponent's. Place a tack switch beside the voltage regulator across the DIP support. Use a solid to connect the power rail to the top left prong of the tack switch. Take a 110Ω resistor and connect from the bottom left prong of the tack switch back to the upper half of the breadboard. Place a LED with the longer leg from the 110Ω resistor to the ground rail with the shorter leg. This will be our trigger for the clock. To save our code on the dip switch, the clock needs to be triggered for the flip flop to remember it. The LED will act as an indicator light for each clock cycle.
Step 3: Setting Up the DIP Switch
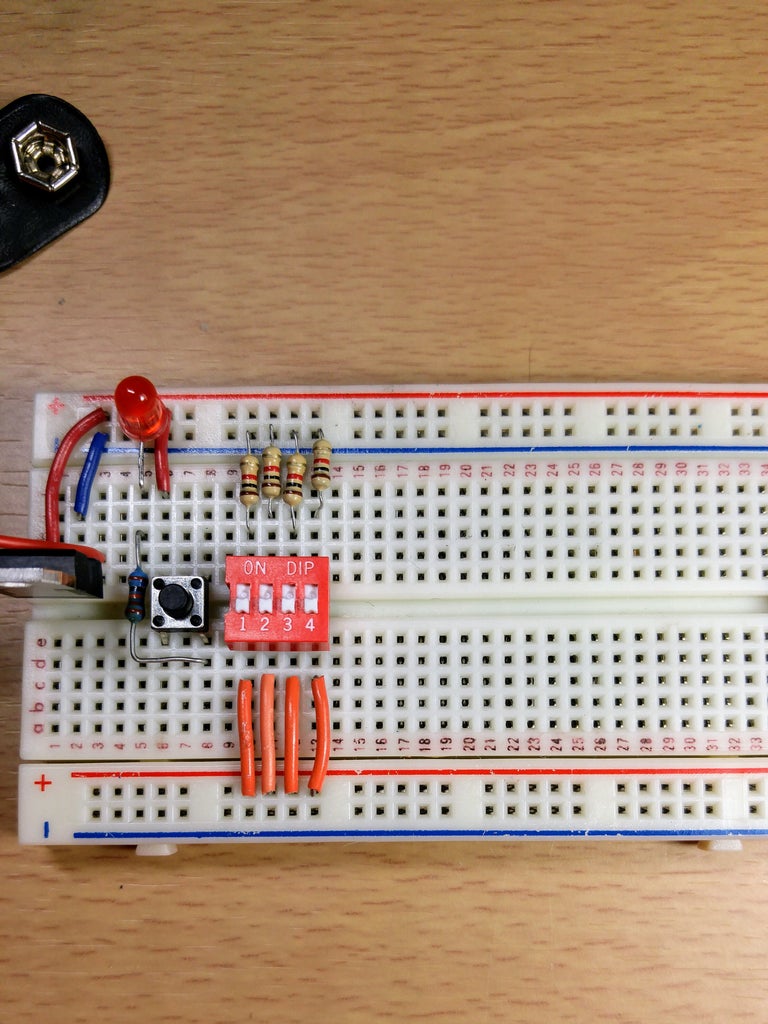
Place a DIP switch to the right of the tack switch. To set up the DIP switch, take 4 solid wires and connect each of the bottom pins to the bottom power rail. Take 4 1kΩ’s and connect the top 4 pins of the dip switch to the upper ground rail as pull up resistors. Leave 1-2 rows between the resistors and the dip switch
Step 4: Setting Up the D Flip Flops
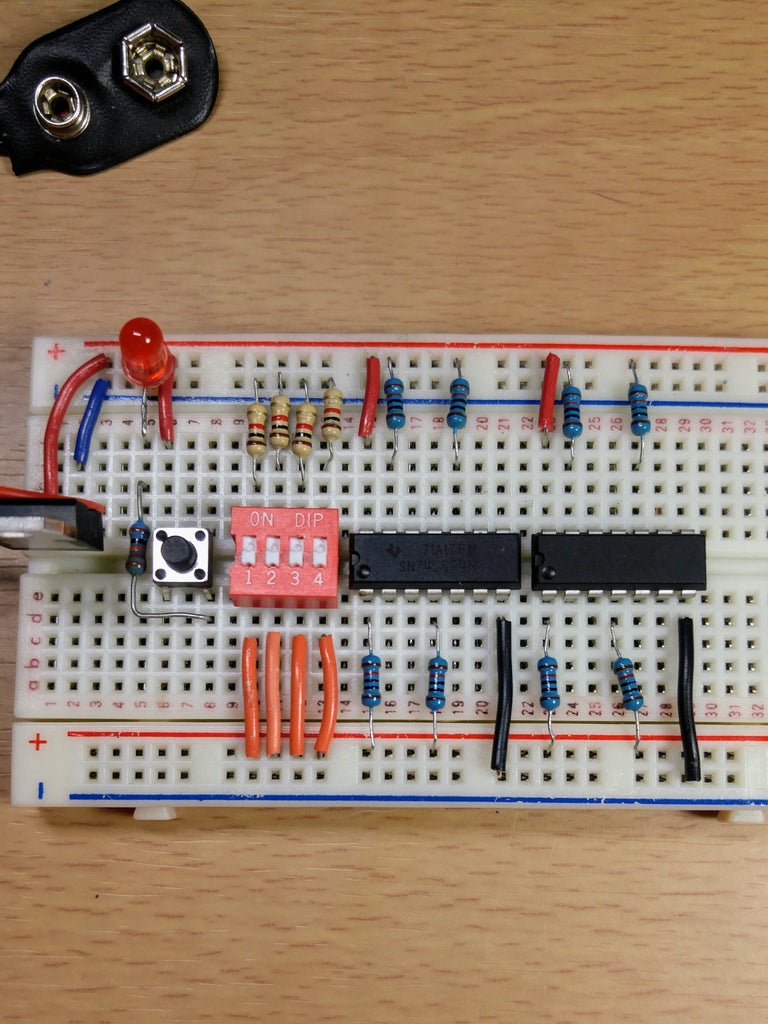
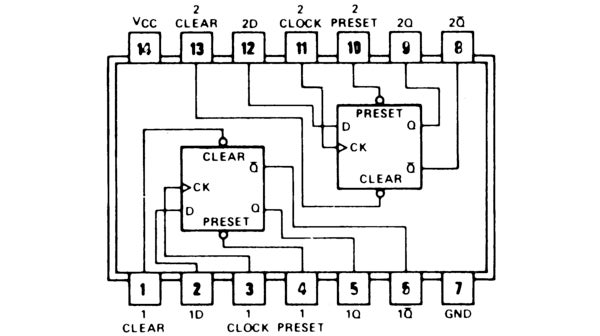
Place 2 Dual D-Type Flip-Flops chips (74HC74/74LS74/4013) next to each other to the right of the DIP switch. Take solid wires and connect pin 14 (Vcc) to the upper power rail, and pin 7 (GND) to the lower ground rail for both flip flops. Take 10K Ω resistors to connect pins 1, 4, 10, and 13 to the power rails to connect both D flip flop’s asynchronous set-direct input and asynchronous reset-direct input on each chip
Step 5: Hook Up the D Flip-Flops to the DIP Switch and Tack Switch
.png)
.jpg)
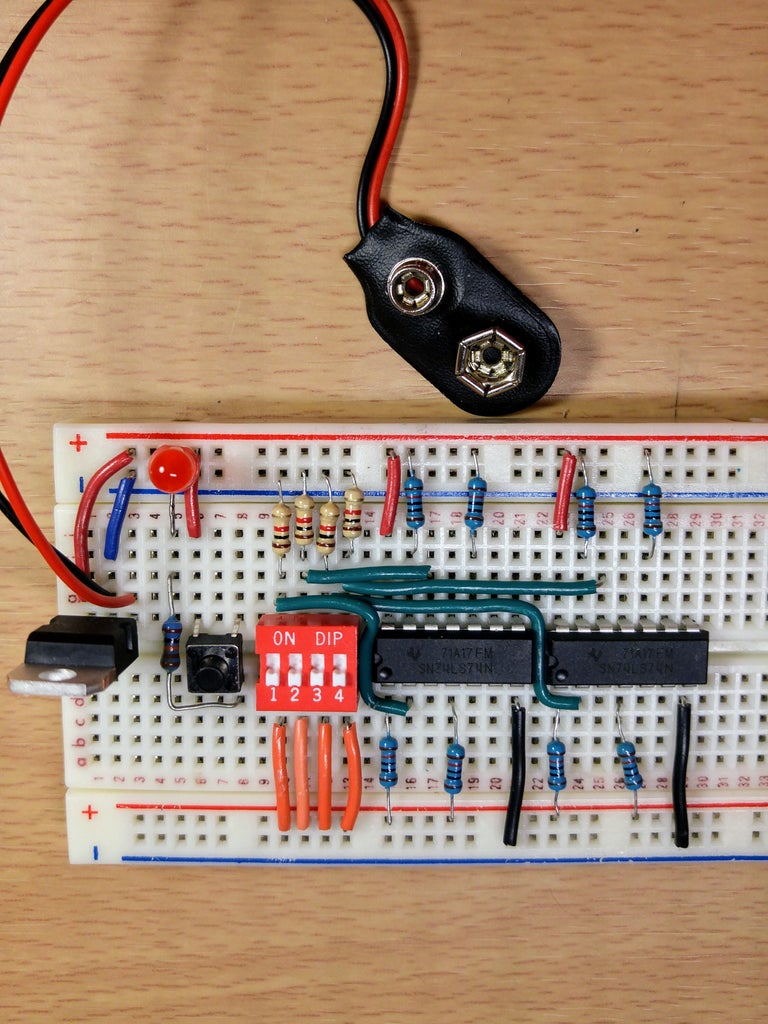
Connect pin 2 of leftmost 74HC74 chip to top pin 1 on the DIP switch and pin 2 of rightmost chip to top pin 3. Connect pin 12 of leftmost 74HC74 chip to top pin 3 on the dip switch and pin 12 of rightmost chip to top pin 4.
Connect pins 3 and 11 on both chips to the same column as the top right prong of the tack switch
Step 6: Build the Other 3 Sets


Now that we have one set, we will need to make the other 3 so that each player has one set to set their pattern, and the other to guess the opponent’s. You can do so by running steps 2 to 8 again, but you may want to switch up the colours of the LED for the other set.
Step 7: On to Another Breadboard
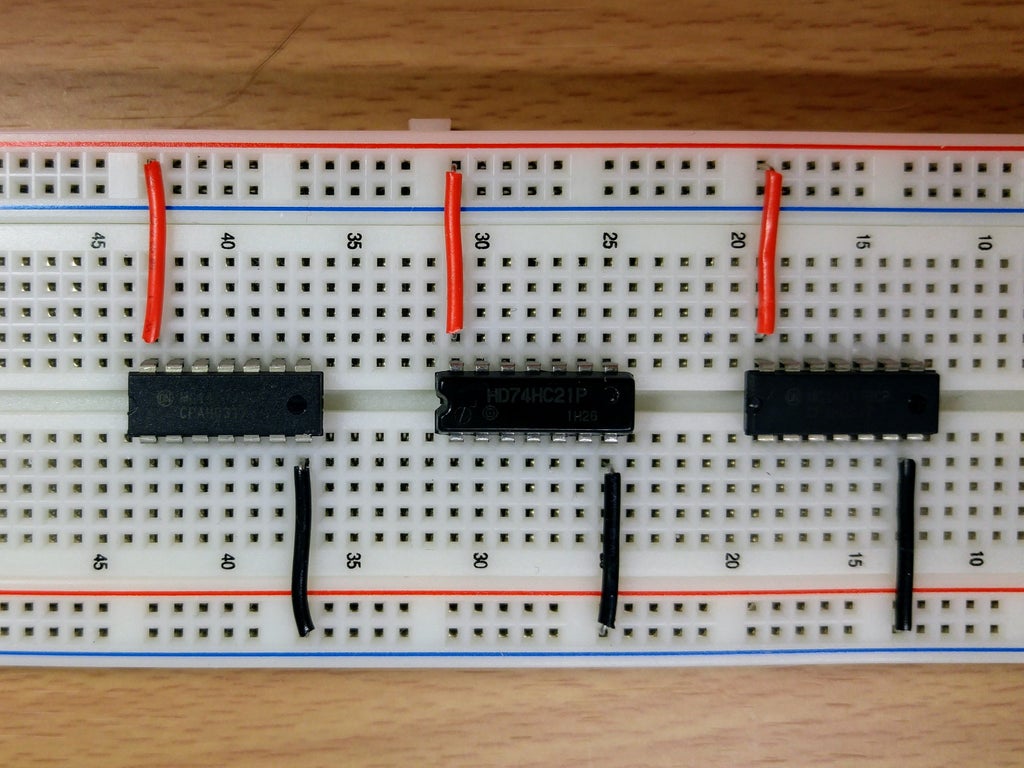

Now that we have 4 separate sets, we will be using the 2 Dual 2-input XNOR chips (74HC266/74LS266/4077) to do the matching and the 4-input AND chip (74HC21/74LS21/40) to make sure all 4 positions are true. Start by placing all 3 chips on another breadboard and connect pin 14 (Vcc) to the upper power rail, and pin 7 (GND) to the lower ground rail. Now place a jumper cable on pins 5 and 9 for every 74HC74 (all 8 D-Flip Flops)
Step 8: Connecting the Quad 2-input XNOR Chip to the Dual 4-input AND Chip
.jpg)
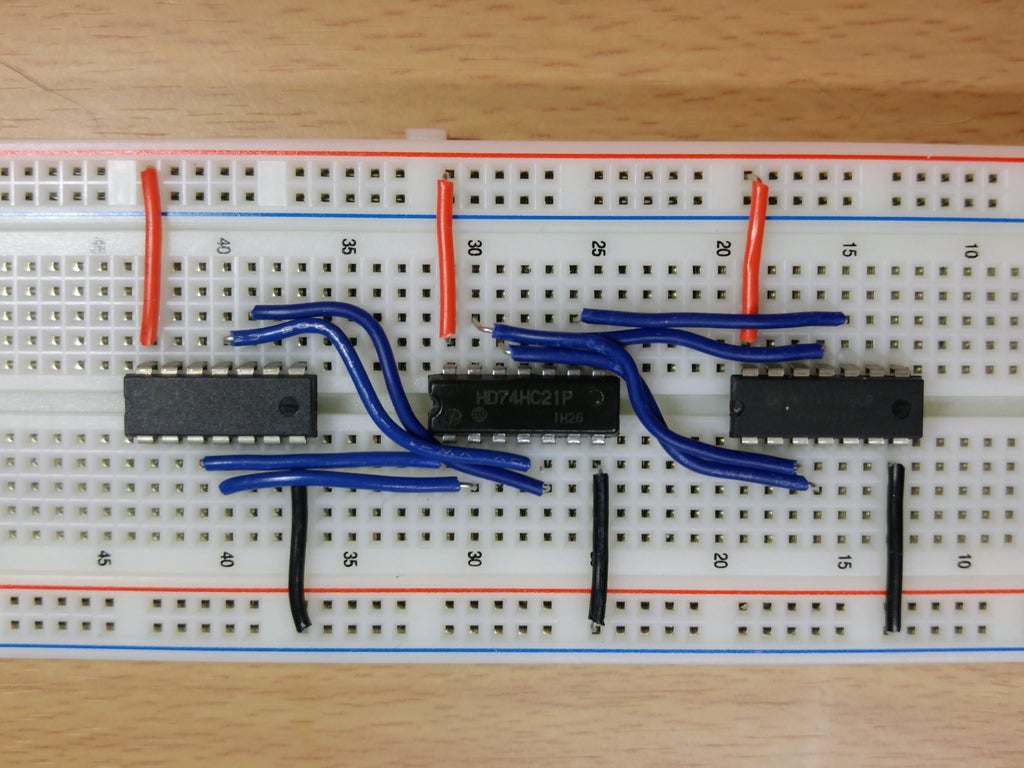
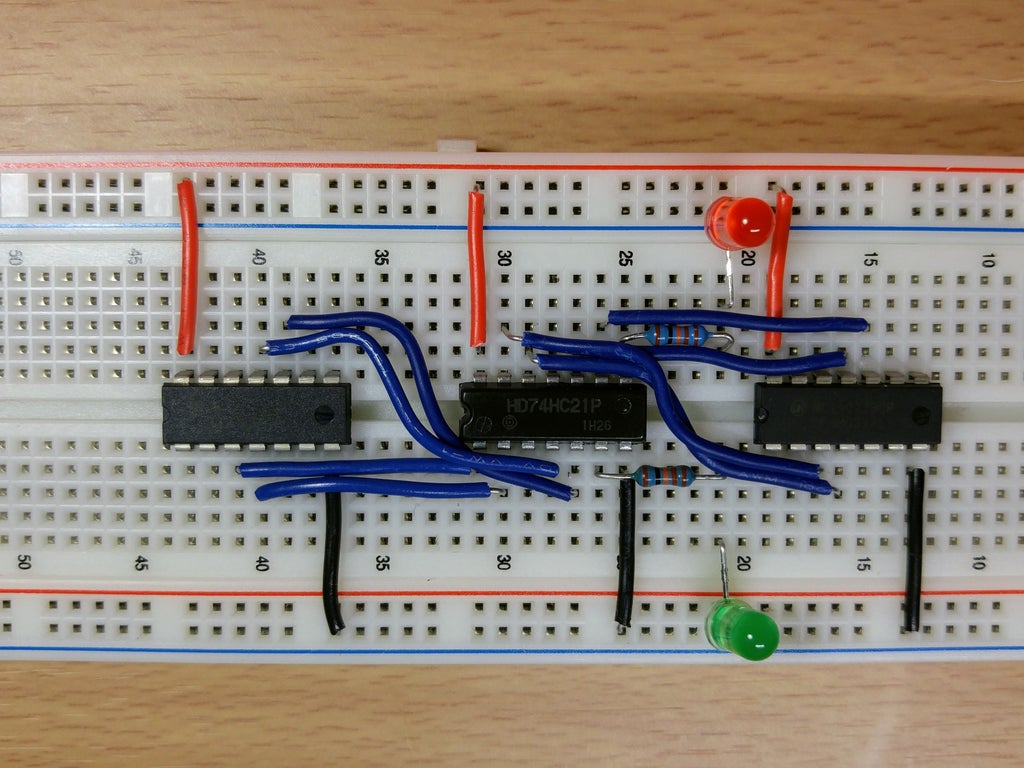
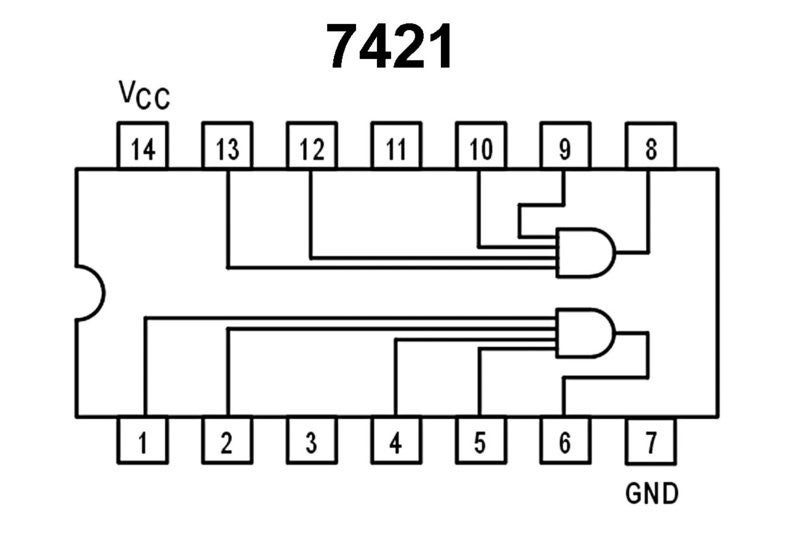
Connect the output pins of each Quad 2-input XNOR chip, 74HC266 (pins 3,4,10,11), to the input pins of the Dual 4-input AND chip, 74HC32 (pins 1,2,4,5 for one XNOR chip, pins 9, 10, 12, 13 for the other XNOR chip), using solid wire. Take a 110Ω resistor and connect pins 6 and 8 to their own row on the breadboard respectively. Connect a LED of the respective colour with the longer leg from the 110Ω resistor to the ground rail with the shorter leg. The LED will act as an indicator light when the code of the DIP switch is guessed correctly.
Step 9: Tying It All Together
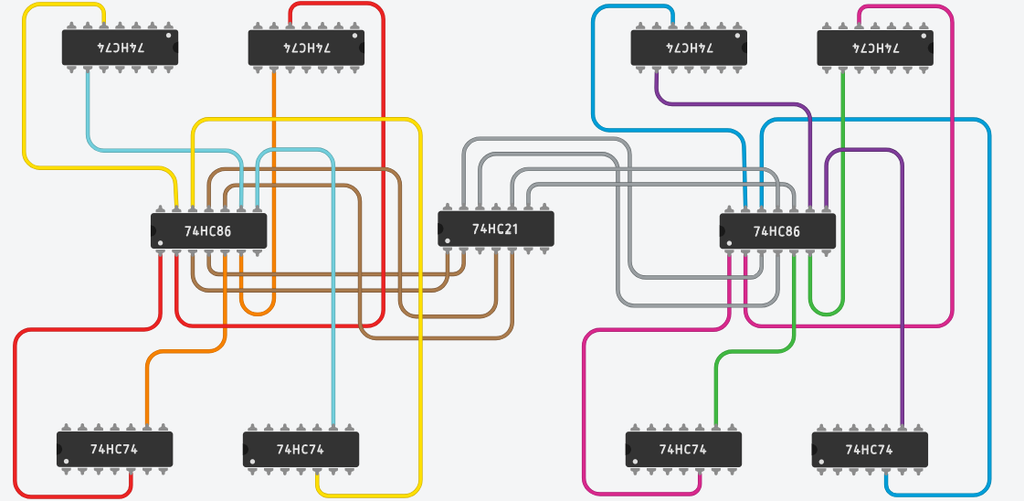
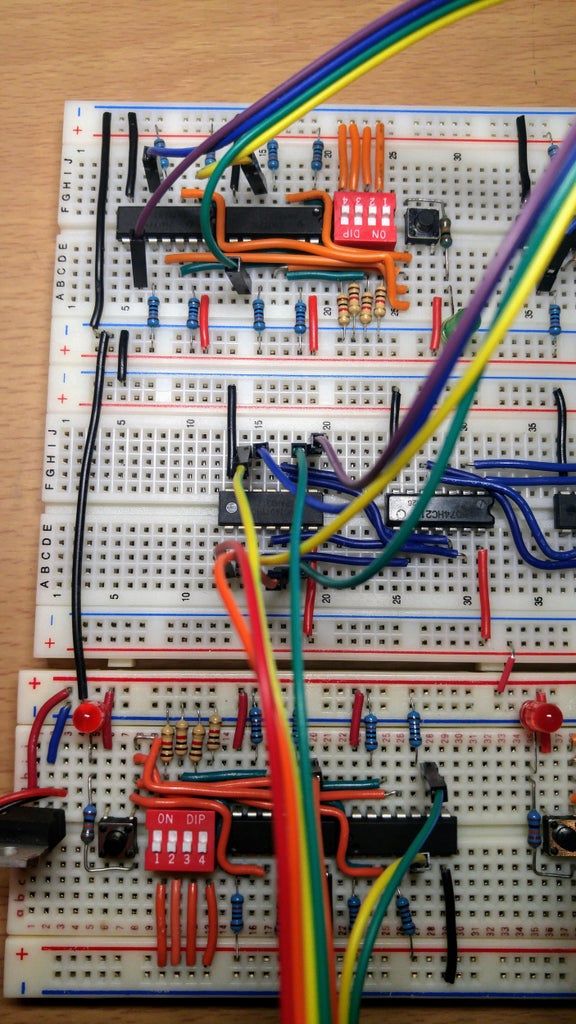
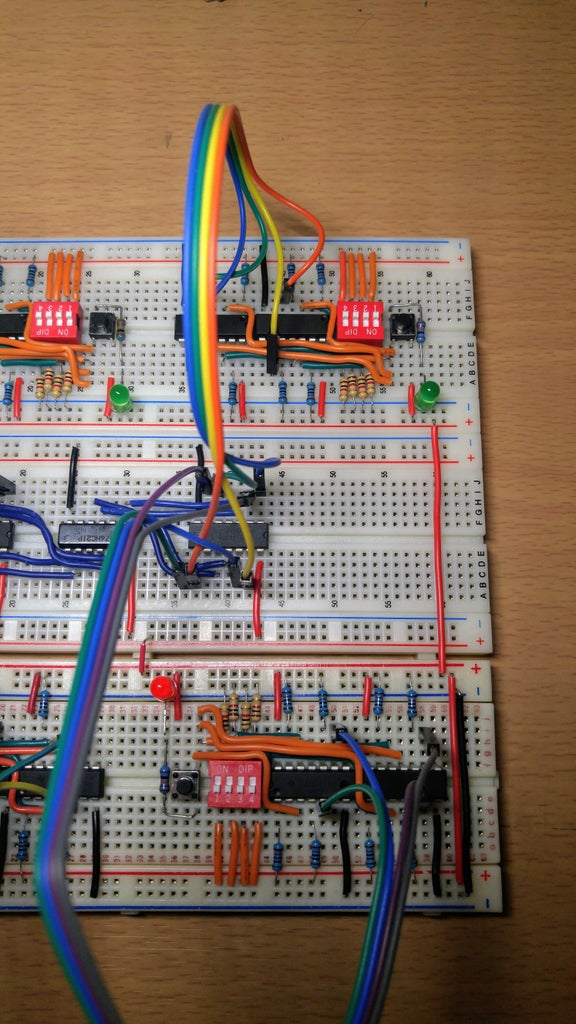
This next part is crucial. Take the jumper wire already on the pin 5 of a 74HC74 chip right next to the DIP switch and the same jumper wire on the adjacent unit and place it in pins 1 and 2 of the 74HC266. What you should have now is the output of the D Flip Flop that is hooked up to the first position of the DIP switch on two units running through the same XNOR gate. This is designed so that the gate only generates a true when that position for both units are either in the on position or in the off position. Do the same for the jumper wires on pin 9 of the 74HC74 chip for the same two units and place it in pins 5 and 6 of the 74HC266. Moving on to the 74HC74 furthest from the DIP switch and place the jumper wires on pin 5 of the 74HC74 chip for the same two units and place it in pins 12 and 13 of the 74HC266. We can finally end off with placing pin 9 of the same chip for both units on pins 8 and 9. You will need to do the same for the other two sets.
Step 10: Final Touches
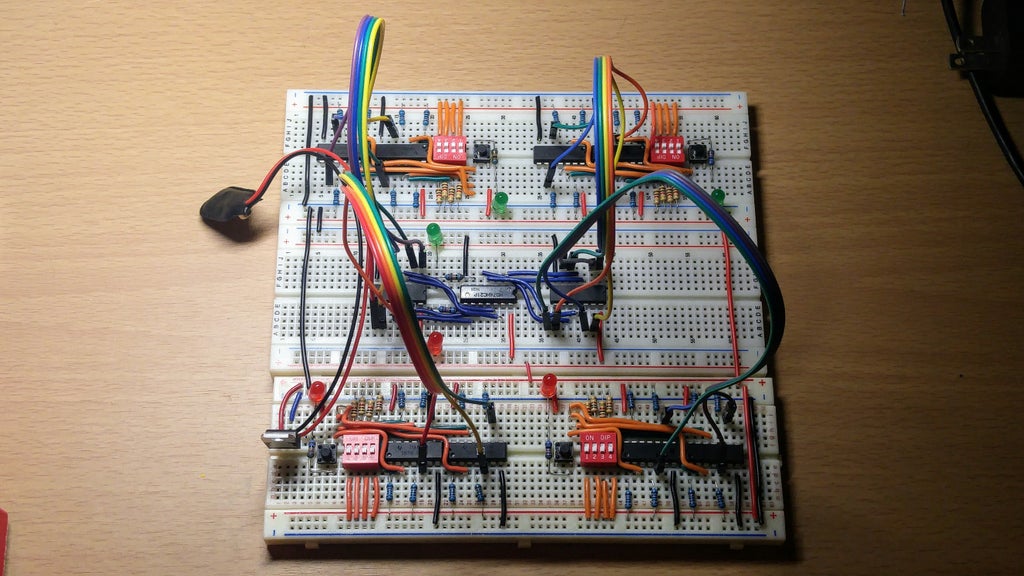
Finally, connect the power and ground rails of the other two breadboards to the one with the voltage regulator.
Step 11: A Video for Reference
Related posts
-
 Touch Switch Circuit With Mosfet
10/19/20173961 viewsThe simple touch switch LED circuit utilizes biasing characteristics of the MOSFET.Read more
 -
 Egg Timer
11/16/20182533 viewsThis project demonstrates the basics of digital logic, the characteristics of a NE555 timer, and demonstrates how...Read more
 -
 Arduino Piano Project
10/23/20172589 viewsThis is a piano board with eight push button switches that allows you to play one octave (Do Re Mi Fa So La Si Do)...Read more
 -
 Small AC to DC Converter
03/16/20183018 viewsThe small AC to DC Voltage Converter project uses four diodes to make one bridge rectifier to transfer AC power to DC...Read more
 -
 RF Remote Control Car
03/09/20173787 viewsThe RC car is a great project for all ages and it doesn’t require any programming. It uses simple integrated circuits...Read more


.png)
