How we will approach our orders going forward with the CUPW strike.
Store address and hours
location_on 4131 Fraser St. Vancouver BC Get Directions
phone 604-875-1993 Call us
access_time Hours
| Monday - Friday | 9AM - 5:30PM |
| Saturday - Sunday & Holidays | Closed | See Holiday Hours |

-
 close
close -
CATEGORIES
-
-
-
-
-
-
-
-
-
-
-
-
-
Featured Items
-
-
-
-
-
-
-
More mirco-controllers
-
More Developement Tools
-
-
More Prototyping
-
More Modules
-
-
Featured Items
-
More prototyping Tools
-
-
-
-
-
-
-
-
Featured Item
-
-
-
-
-
-
-
Featured Items
-
-
-
-
-
-
-
-
-
-
Featured Items
-
-
-
-
-
-
-
-
-
-
-
Featured Items
-
-
-
-
-
-
-
-
-
Featured Items
-
-
-
-
-
-
Popular Cleaners
-
-
-
Featured Items
-
-
-
-
-
-
-
Featured Items
-
-
-
-
-
Featured Items
-
-
-
-
Featured Products
-
-
-
-
-
more motor
-
-
more power supplies
-
-
Featured Items
-
-
-
more electrical devices
-
-
-
-
-
-
-
Featured Items
-
-
-
-
-
-
BRANDS
-
- PROJECTS
-
COMMUNITY
-
-
-
FEATURED POSTS
-
-
-
- SALE
Arduino Piano Project
Created by : Haotian Ye
Overview:
This is a piano board with eight push button switches that allows you to play one octave (Do Re Mi Fa So La Si Do) and with this one octave you can try to play some songs you like. For this project there are some important knowledge you need to know before you start.
First, we need to know the frequencies of basic notes of a piano.
The frequencies are listed below:
Do – 261Hz
Re – 294Hz
Mi – 329Hz
Fa – 349Hz
So – 392Hz
La – 440Hz
Si – 493Hz
Do – 523Hz
Second, I will show you how to build the circuit by using the parts that can be bought from Lee’s Electronic Store. Finally,I will present and explain the code that need to be uploaded onto the Arduino board.
Parts You Will Need:
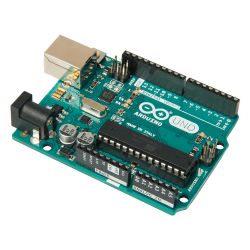
Arduino Uno R3 (Product ID: 10997)
USB A to B Cable M/M (Product ID: 29861)
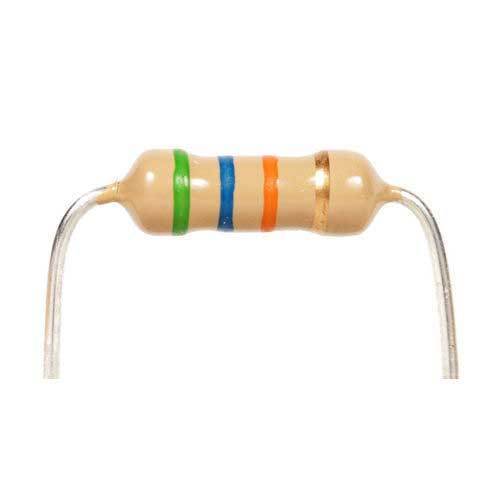
10K Resistor * 8 (Product ID: 91516)
Different Colors of Tack Switch * 8 (Product ID: 3124, 31242, 31243, 31245, 31246)
Mini Speaker (Product ID: 41680)
Step 1: Step 1: Building the Circuit
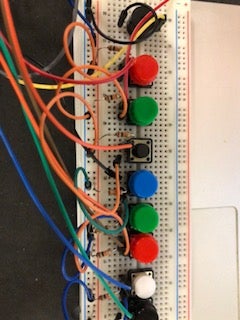
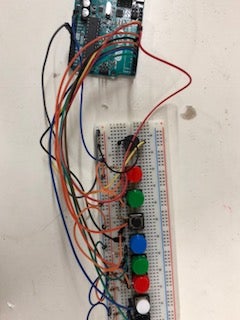
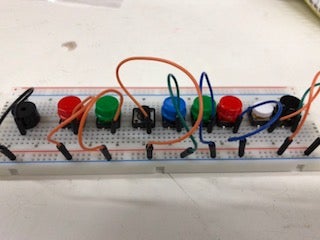
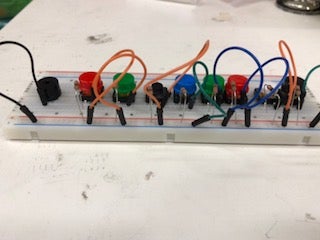
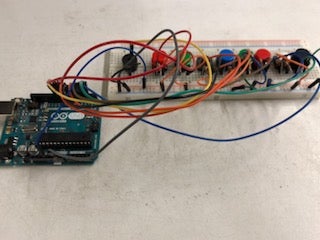
First, insert all the push button switches and mini speaker on breadboard one by one and match them on one row. Then connect the pins of each push button switches to the ground. Second connect 10k resistors between positive power and the other pins of each push button switches. And, connect this column to pins 2-9 on Arduino Board. Also, connect the ground to the ground pin and positive power to 3.3v pin on Arduino. Finally, connect the mini speaker to the pin 10 on Arduino.
Step 2: Step 2: Code and Explanation
The code below is what I wrote
const int black = 2;
const int white = 3;
const int red = 4;
const int green = 5;
const int blue = 6;
const int black2 = 7;
const int green2 = 8;
const int red2 = 9;
const int speaker = 10;// Link all push button switches and speaker with arduino's signal pins
int frequency[ ] = {262, 294, 330, 349, 392, 440, 493, 523};// array contain all frequencies of one octave
void setup() {
// put your setup code here, to run once:
pinMode (black, INPUT);
pinMode (white, INPUT);
pinMode (red, INPUT);
pinMode (green, INPUT);
pinMode (blue, INPUT);
pinMode (black2, INPUT);
pinMode (green2, INPUT);
pinMode (red2, INPUT);
pinMode (speaker, OUTPUT);
tone (speaker, 2000);
Serial.begin (9600);
}
void loop() {
// put your main code here, to run repeatedly:
if (digitalRead(black) == LOW)// when you press the "DO" push button switch
{tone(speaker,frequency[0],50);
delay (50);
noTone (speaker);}
else if (digitalRead(white) == LOW)// when you press the "RE" push button switch
{tone(speaker,frequency[1],50);
delay (50);
noTone (speaker);}
else if (digitalRead(red) == LOW)// when you press the "MI" push button switch
{tone(speaker,frequency[2],50);
delay (50);
noTone (speaker);}
else if (digitalRead(green) == LOW)// when you press the "FA" push button switch
{tone(speaker,frequency[3],50);
delay (50);
noTone (speaker);}
else if (digitalRead(blue) == LOW)// when you press the "SO" push button switch
{tone(speaker,frequency[4],50);
delay (50);
noTone (speaker);}
else if (digitalRead(black2) == LOW)// when you press the "LA" push button switch
{tone(speaker,frequency[5],50);
delay (50);
noTone (speaker);}
else if (digitalRead(green2) == LOW)// when you press the "SI" push button switch
{tone(speaker,frequency[6],50);
delay (50);
noTone (speaker);}
else if (digitalRead(red2) == LOW)// when you press the "DO" push button switch
{tone(speaker,frequency[7],50);
delay (50);
noTone (speaker);}
else// when you press nothing
noTone (speaker);
}
First, we have to declare all the push button switches and speaker as the pin from 2 to 10 on Arduino. Each switch represent for one note. Then, use one array to put all the frequencies inside. Next, If and else statement is what I use to let Arduino know which push button switch I press.
Finally, connect your Arduino board to your computer or laptop with usb A to B cable. Before you upload your code, you still need to download Arduino software and do some default setting. Select Tools -andgt; Board -andgt; Arduino/Genuino Uno; Then we need to select the communication port connected to the Arduino board. Select Tools -andgt; Port, then whichever port name is labeled "(Arduino/Genuino Uno)." Then, you can upload the code to Arduino board.
Step 3: Video Demonstration
Related product
-
ARDUINO UNO Rev3
Price: CA$33.00The Arduino Uno Rev3 is a microcontroller board based on the ATmega328...
Related posts
-
 Touch Switch Circuit With Mosfet
10/19/20174441 viewsThe simple touch switch LED circuit utilizes biasing characteristics of the MOSFET.Read more
 -
 Egg Timer
11/16/20182898 viewsThis project demonstrates the basics of digital logic, the characteristics of a NE555 timer, and demonstrates how...Read more
 -
 Small AC to DC Converter
03/16/20183291 viewsThe small AC to DC Voltage Converter project uses four diodes to make one bridge rectifier to transfer AC power to DC...Read more
 -
 RF Remote Control Car
03/09/20174103 viewsThe RC car is a great project for all ages and it doesn’t require any programming. It uses simple integrated circuits...Read more
 -
 Magnetic Railgun
09/19/20175415 viewsThe concept of a railgun consists of propelling a conducting object along 2 conducting rails due to a magnetic force...Read more


.png)
