How we will approach our orders going forward with the CUPW strike.
Store address and hours
location_on 4131 Fraser St. Vancouver BC Get Directions
phone 604-875-1993 Call us
access_time Hours
| Monday - Friday | 9AM - 5:30PM |
| Saturday - Sunday & Holidays | Closed | See Holiday Hours |

-
 close
close -
CATEGORIES
-
-
-
-
-
-
-
-
-
-
-
-
-
Featured Items
-
-
-
-
-
-
-
More mirco-controllers
-
More Developement Tools
-
-
More Prototyping
-
More Modules
-
-
Featured Items
-
More prototyping Tools
-
-
-
-
-
-
-
-
Featured Item
-
-
-
-
-
-
-
Featured Items
-
-
-
-
-
-
-
-
-
-
Featured Items
-
-
-
-
-
-
-
-
-
-
-
Featured Items
-
-
-
-
-
-
-
-
-
Featured Items
-
-
-
-
-
-
Popular Cleaners
-
-
-
Featured Items
-
-
-
-
-
-
-
Featured Items
-
-
-
-
-
Featured Items
-
-
-
-
Featured Products
-
-
-
-
-
more motor
-
-
more power supplies
-
-
Featured Items
-
-
-
more electrical devices
-
-
-
-
-
-
-
Featured Items
-
-
-
-
-
-
BRANDS
-
- PROJECTS
-
COMMUNITY
-
-
-
FEATURED POSTS
-
-
-
- SALE
Make an Interactive Memory Game from the Touch Board Starter Kit
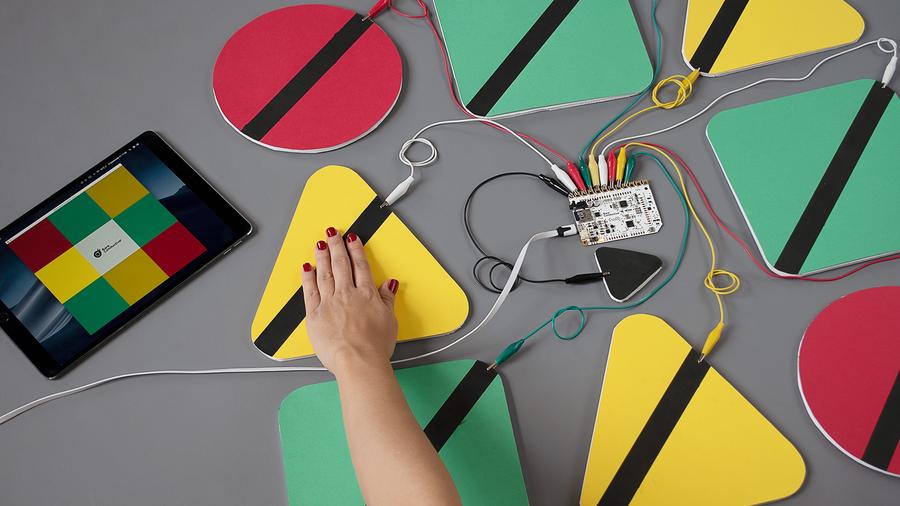
In this tutorial, we are going to learn how to use conductive ink to create and play an interactive memory game. The game is similar to the game "Simon Says" where the player has to remember a sequence of colours. The paint is used to create an interface on the buttons for the game and the Touch Board is configured as a keyboard and communicates with the computer.
Before we begin, make sure to download Processing and set up the Touch Board with the Arduino IDE.
Step 1: Cut out the Buttons
First, we're going to create the game buttons. Cut out 8 pieces of different shapes from red, green, yellow cardboard and make sure each individual shape is about the size of A4 paper. We want to have 3 yellow, and green buttons and 2 red ones. Additionally, cut out one more piece for a start button from black cardboard, which is smaller than the other buttons. This will be start and reset button.
Step 2: Paint the Buttons
Next, we're going to apply Electric Paint to the buttons, which is going to be the interface for the game. We painted diagonal lines and used masking tape to neatly apply the paint. If you also want to use masking tape. we recommend sticking the strip of masking tape to a piece of clothing first to reduce its stickiness and avoid ripping the cardboard.
Step 3: Upload the code onto Touch Board
While the paint is drying, connect your Touch Board to your computer with the USB cable and turn the Touch Board on. In the Arduino IDE go to:
File -> Sketchbook -> Touch Board Examples -> HID_Keyboard
In the code, comment out line 50 and comment in line 52. Make sure to select the correct Board and Port settings before hitting upload.
When the code has been uploaded, swipe across the electrodes on the Touch Board from E0 to E8 to test the code. On your computer, the numbers: "801234567" should have appeared in the code file. You can simply remove it again, we are just checking if the code is working as expected.
Step 4: Prepare the game in Processing
If you haven't used Processing before, open and close it once so that it generates the necessary files for initial set up.
Then download Bare Conductive's game (Click Here). Unzip the file and move the folder "MemoryGame" to the corresponding directory:
Windows
Libraries\Documents\Processing
or
My Documents\Processing
Mac
Documents/Processing
Linux (Ubuntu)
Home/Processing
With the folder in place, open Processing. We will need to install the "Sound" Library for the game. In Processing, head to:
Sketch -> Import Library ->Add Library...
In the search field, look for "Sound" and then click "Install". Once you have installed the library, open the game sketch, by heading to: File -> Sketchbook and then opening "MemoryGame". If you want, you can run it, by pressing the "Run" button in Processing.
Step 5: Connect the buttons to the Touch Board
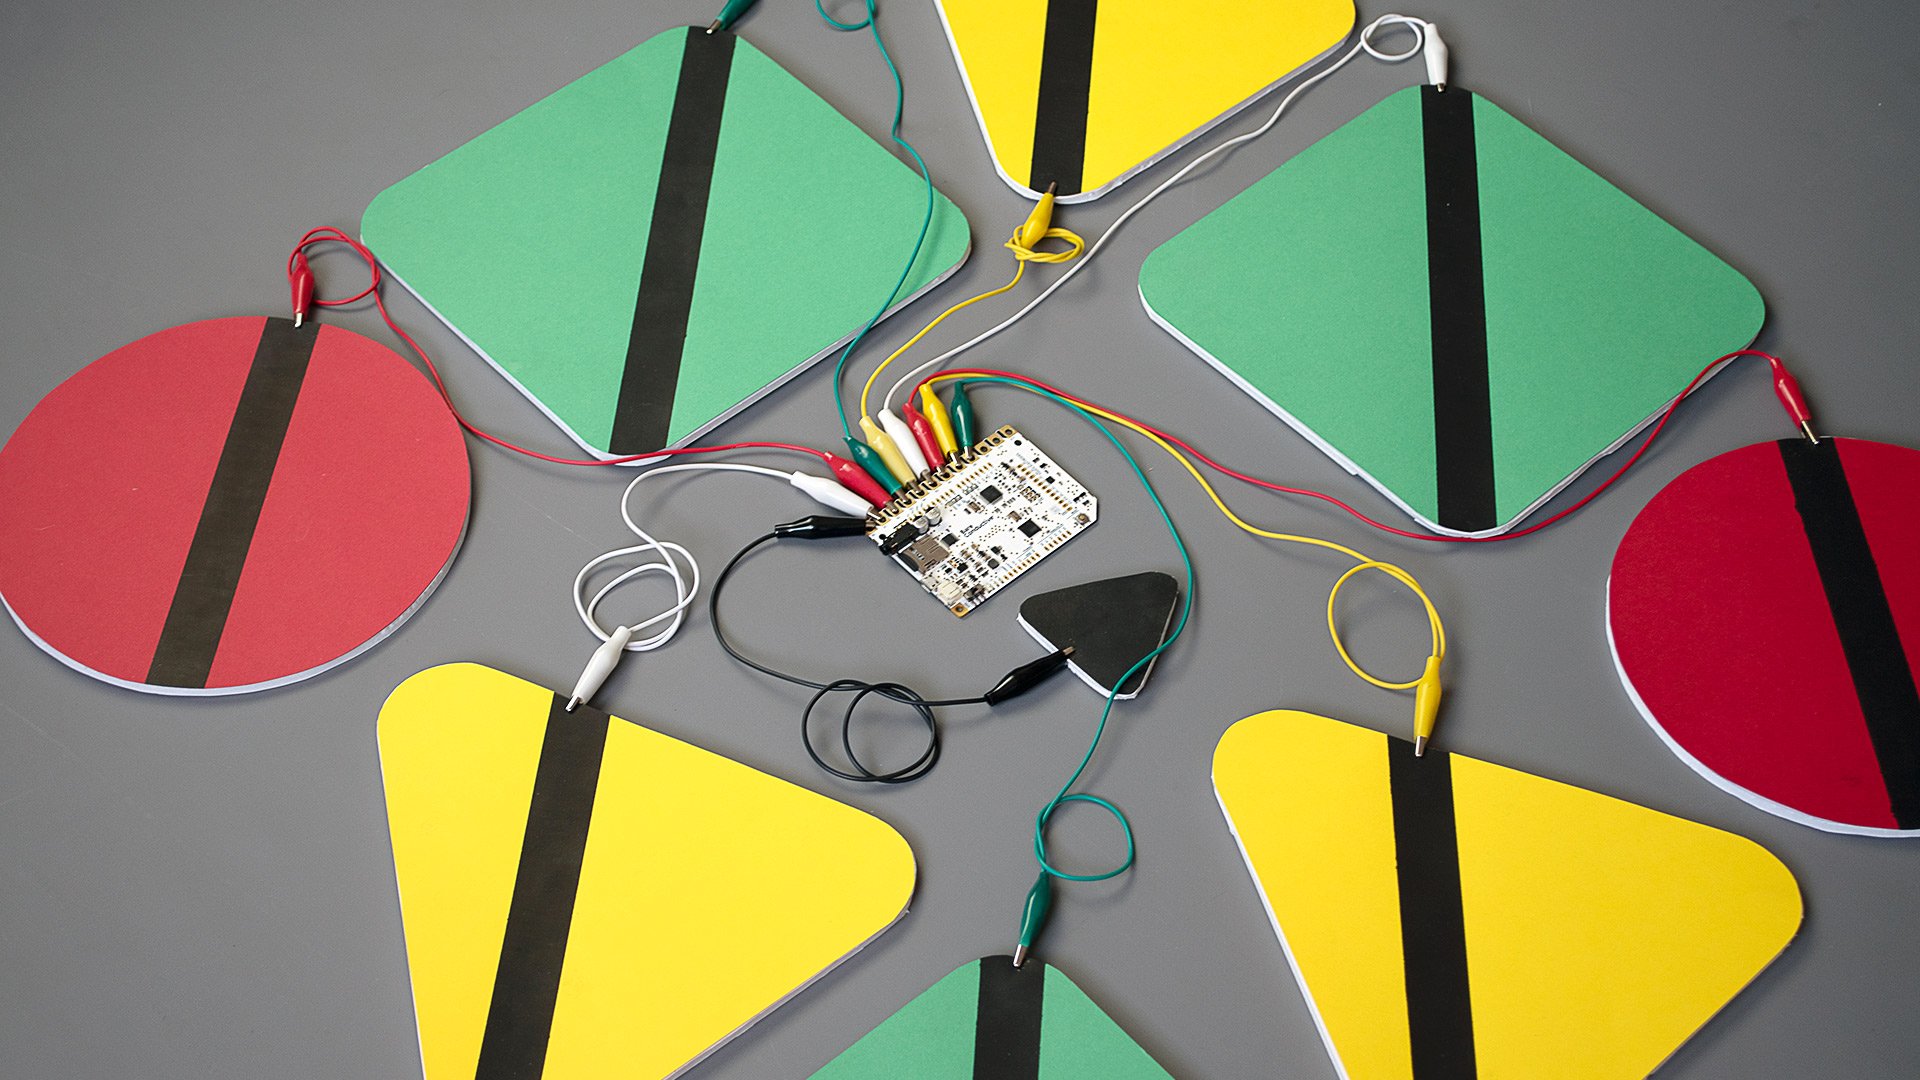
Once the paint has dried and the code has been uploaded to the Touch Board, turn the Touch Board off and disconnect it from the computer. Take 9 alligator to alligator clips and attach them to the Touch Board from E0 to E8. Connect the other end of the alligator clips to the painted buttons making sure that paint is in contact with theclips. Make sure that none of the cables is crossing over each other as it might cause interference. In the end, you want to have a set-up like the image below.
Step 6: Play the game
Connect your Touch Board to the computer again and turn the board on. In Processing, run the game and then press your start button to play. Learn and memorize the sequence of colours and sounds and press the corresponding buttons in the order they appear on the screen. Voila! we have successful created an interactive memory game using the Touch Board Starter Kit.
What is next?
We can take this project even further by modifying the memory game in Processing or designing our own game controllers. Here is an example of modification: change the button fields in Processing by changing the colours of each buttons. They are declared in the set-up with each button have a HEX number for their colour. You can also increase the number of buttons making the difficulty of the game higher.
To learn more about the Touch Board Starter Kit: Click Here
Related products
-
TOOL, BARE CONDUCTIVE ELECTRIC PAINT (50ML)
Price: CA$34.00Bare Conductive's Electric Paint is just like any other water-based paint…... -
TOOL, BARE CONDUCTIVE ELECTRIC PAINT PEN (10ML)
Price: CA$17.50TOOL, BAREPAINT CONDUCTIVE ELECTRIC PAINT PEN (10ML). Bare Conductive’s... -
BARE CONDUCTIVE , TOUCH BOARD STARTER KIT, SKU-5235
Price: CA$205.00BARE CONDUCTIVE , TOUCH BOARD STARTER KIT, SKU-5235 -
BARE CONDUCTIVE, TOUCH BOARD PRO KIT, SKU-5303
Price: CA$300.00 -
BARE CONDUCTIVE, TOUCH BOARD SKU-5013
Price: CA$75.00
Related posts
-
 Available Electric Paint Sizes
06/01/2021890 viewsListed here are the available sizes of Electric Paint and potential ideas for each sizeRead more
 -
 Five Things you can do with an Electric Paint 10mL Tube
06/01/2021893 viewsHere are five things you can do with Electric PaintRead more
 -
 Five Things you can do with a 50mL Electric Paint Jar
06/02/2021966 viewsHere are five things you can do with a 50mL Electric Paint jarRead more
 -
 Electric Paint Circuit Kit
06/02/20211045 viewsInformation about Bare Conductive's Electric Paint Circuit KitRead more
 -
 Electric Paint Lamp Kit
06/08/2021840 viewsAll about Bare Conductive's Electric Paint Lamp KitRead more


.png)
