How we will approach our orders going forward with the CUPW strike.
Store address and hours
location_on 4131 Fraser St. Vancouver BC Get Directions
phone 604-875-1993 Call us
access_time Hours
| Monday - Friday | 9AM - 5:30PM |
| Saturday - Sunday & Holidays | Closed | See Holiday Hours |

-
 close
close -
CATEGORIES
-
-
-
-
-
-
-
-
-
-
-
-
-
Featured Item
-
-
-
-
-
-
-
more electrical devices
More electrical devices -
more electrical devices
More electrical devices
-
-
more electrical devices
More electrical devices -
more electrical devices
More electrical devices
-
-
Featured Items
-
more electrical devices
More electrical devices
-
-
-
-
-
-
-
-
Featured Item
-
-
-
-
-
-
-
Featured Items
-
-
-
-
-
-
-
-
Featured Items
-
-
-
Featured Items
-
-
-
-
-
-
-
-
-
-
-
Featured Items
-
-
-
-
-
-
-
-
-
Featured Items
-
-
-
-
-
-
featured
-
-
-
Featured Items
-
-
-
-
-
-
-
Featured Items
-
-
-
-
-
Featured Items
-
-
-
-
Featured Products
-
-
-
More Filaments
More Filaments
-
-
-
-
more electrical devices
More electrical devices
-
-
more electrical devices
More electrical devices
-
-
Electrical Devices
-
-
-
more electrical devices
More electrical devices
-
-
-
-
-
-
-
Featured Products
-
-
-
Featured Products
-
-
-
-
BRANDS
-
-
-
-
Brands/Manufacturers
-
-
Manufacturer 3
-
-
- PROJECTS
-
COMMUNITY
-
- SALE Sale
Arduino Weather Station
Step 1: Item List

1. Screen: OLED, 1.3" Display SH1106, I2C white color ---- PID: 18283
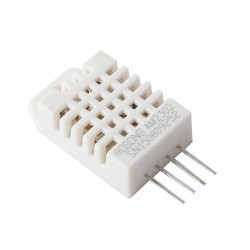
2. Sensor: Digital Humidity and Temperature Sensor DHT22 ---- PID: 7375
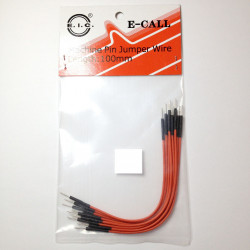
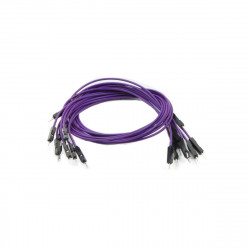
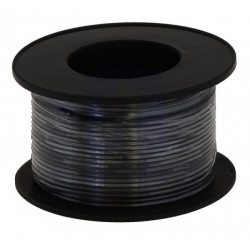
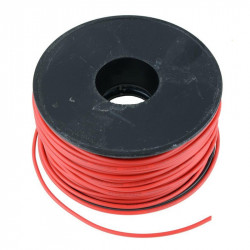
3. Connects: Jumper Wires ---- PID: 10316 or 10318 or 10312 (depends on the length) or you can use solid wire 22 AWG ---- PID: 22490
Breadboard ---- PID: 10686 or 10698 or 103142 (depends on size)
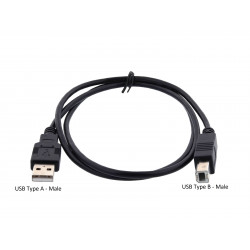
4. Power: This cable can only connect with a computer USB port and the cable is also used for data transfer between the IDE and Arduino board. USB CABLE, A TO B, M/M, 0.5M (1.5FT) ---- PID: 29862
Or you can use this to power the board: 5V 2A AC/DC Adapter ---- PID: 10817.
Step 2: Relative Introduction


Introduction of Screen: 1.3" OLED Display White
1. You can find the document that shows the basic setup and descriptions:
OLED DISPLAY DATASHEET
Introduction of Sensor: Humidity and Temperature Sensor DHT22 1. You can find the document that shows the descriptions:
DHT22 DATASHEET
Step 3: Connect the Circuit

The DHT22 sensor sends serial data to pin 2. So, connect the second pin from left, the "SDA" pin should be connected to pin 2.
For the SSH1106 display, it uses the analog pin to transmit. The circuitry of the screen will be "SCL" pin to Arduino's "A5" and "SDA" pin to Arduino's "A4". While the pixel position data is transmitting continuously, the display function in the program only triggers the command once every time it reads the data from the sensor.
Both the sensor and screen can use the 3.3V to power on Arduino as a DC power input. To power, we need to connect both the "VCC" pins to Arduino’s "3.3V". And the "GND" pins can be simply connected to the "GND" pin on the Arduino board.
Use the USB A to B cable, connect the Arudino to computer.
Step 4: Prepare to Compile
"u8glib" for SSH1106 screen from Olikraus.
"DHT sensor library" for DHT22 sensor from Adafruit. You should download the two libraries: DHT22 sensor library: https://github.com/adafruit/DHT-sensor-library
U8glib: https://github.com/adafruit/DHT-sensor-library
And use “manage library” in IDE to make them unzipped. Online instruction of managing libraries: https://github.com/adafruit/DHT-sensor-library
Attachments
Step 5: Test Code for DHT22 Sensor Serial Port
Test coe for DHT22 sensor serial port (which is inside the DHT22 libraryandgt;andgt;examples):
(You can skip this part.)
It just to test the DHT22 sensor reads data normally.
#include andlt;Arduino.handgt;
#include andlt;DHT.handgt;
#include andlt;DHT_U.handgt;
#include andlt;SPI.handgt;
#include andlt;Wire.handgt;
#define DHTPIN 2
#define DHTTYPE DHT22
DHT dht(DHTPIN, DHTTYPE);
void setup() {
Serial.begin(9600);
Serial.println(F("DHT22 test!"));
dht.begin();
}
void loop() {
// Wait a few seconds between measurements.
delay(2000);
// Reading temperature or humidity takes about 250 milliseconds!
// Sensor readings may also be up to 2 seconds 'old' (its a very slow sensor)
float h = dht.readHumidity();
// Read temperature as Celsius (the default)
float t = dht.readTemperature();
// Read temperature as Fahrenheit (isFahrenheit = true)
float f = dht.readTemperature(true);
// Check if any reads failed and exit early (to try again).
if (isnan(h) || isnan(t) || isnan(f)) {
Serial.println(F("Failed to read from DHT sensor!"));
return;
}
// Compute heat index in Fahrenheit (the default)
float hif = dht.computeHeatIndex(f, h);
// Compute heat index in Celsius (isFahreheit = false)
float hic = dht.computeHeatIndex(t, h, false);
Serial.print(F("Humidity: "));
Serial.print(h);
Serial.print(F("% Temperature: "));
Serial.print(t);
Serial.print(F("°C "));
Serial.print(f);
Serial.print(F("°F Heat index: "));
Serial.print(hic);
Serial.print(F("°C "));
Serial.print(hif);
Serial.println(F("°F"));
}
// After compiling the program, click TOOLS andgt;andgt; SERIAL MONITOR to check the data.
// End of the testing program.
Attachments
Step 6: Code for the Project
#include andlt;Arduino.handgt;
#include andlt;DHT22.handgt;
#include andlt;DHT_U.handgt;
#include andlt;SPI.handgt;
#include andlt;Wire.handgt;
#define DHTPIN 2
#define DHTTYPE DHT22
#include "U8glib.h"
U8GLIB_SH1106_128X64 u8g(U8G_I2C_OPT_NONE);
DHT sensor(DHTPIN, DHTTYPE);
void draw(void) {
u8g.setFont(u8g_font_unifont);
float h = sensor.readHumidity();
// Read temperature as Celsius (the default)
float t = sensor.readTemperature();
// Check if any reads failed and exit early (to try again).
if (isnan(h) || isnan(t)) {
u8g.print("Error.");
for(;;);
return;
}
u8g.setPrintPos(4, 10);
u8g.print("Temperature(C):");
u8g.setPrintPos(4, 25);
u8g.print(t);
u8g.setPrintPos(4, 40);
u8g.print("Humidity(%):");
u8g.setPrintPos(4, 55);
u8g.print(h);
}
void setup(void) {
u8g.setRot180();
Serial.begin(9600);
sensor.begin();
}
void loop(void) {
// picture loop
u8g.firstPage();
do {
draw();
} while( u8g.nextPage() );
// rebuild the picture after some delay delay(2000);
}
// End of the main program.
Attachments
Step 7: Description

Then, initialize the pin circuitry for the Arduino board. Because the sensor library requires the data to declare the object.
And you can test the sensor's data by monitoring the output data through digital pin 2 by using the function called "Serial.print()". Because the frequency of data transmission is roughly 1 reading every 2 seconds (which is 0.5 Hz), when programmed in Arduino IDE, we need to set the delay inside the loop function to be more than 2 seconds. So there is a "delay(2000)" inside the loop function. This ensures the data will be refreshed frequently. In the function "draw", get the data from the serial data port and put them into to float numbers using the "readHumidity" and "readTemperature" functions.
Print out the humidity and temperature using the print function in the "u8glib" file. You can adjust the position by changing the number in the "setPrintPos" function. The print function can directly show the text and numbers.
To set up the hardware, give the serial port a 10 seconds delay. Then call the begin function for the sensor. According to my circuit, my screen was upside down. So I also included a "setRot180" function to rotate the display.
The loop function of the Arduino board is the main function. It keeps calling the draw function to display the text and data every time the sensor is refreshed.
The screen looks like this:
You can disconnect the Arduino UNO from your computer and power it using a 5V DC power adaptor connecting to its 2.1mm power jack. It stores the program inside its drive and can continuously run the program again after being powered.
Related products
-
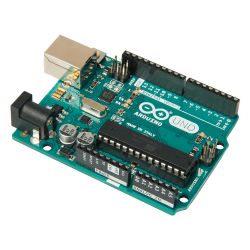
ARDUINO UNO Rev3
Price: 33,00 CA$The Arduino Uno Rev3 is a microcontroller board based on the ATmega328... -
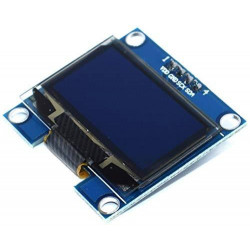
OLED, 1.3 INCH DISPLAY SH1106, I2C WHITE COLOR
Price: 20,00 CA$This 128×64 Pixel OLED display shows white pixel on a dark blue background.... -
DIGITAL HUMIDITY AND TEMPERATURE SENSOR DHT22
Price: 13,50 CA$The RHT03 (also known by DHT-22) is a low cost humidity and temperature... -
-
BREADBOARD JUMPER WIRES 100MM 10/PKG
Price: 5,25 CA$ -
-
HOOK UP WIRE 22AWG SOLID UL1007 BLACK - 50FT/SPOOL
Price: 7,50 CA$ -
HOOK UP WIRE 22AWG SOLID UL1007 RED - 50FT/SPOOL
Price: 7,50 CA$ -
-
POWER ADAPTER, AC/DC, SWITCHING, 5V, 2A, CEN+
Price: 13,50 CA$
Related posts
-
 Touch Switch Circuit With Mosfet
10/19/20174455 viewsThe simple touch switch LED circuit utilizes biasing characteristics of the MOSFET.Read more
 -
 Egg Timer
11/16/20182910 viewsThis project demonstrates the basics of digital logic, the characteristics of a NE555 timer, and demonstrates how...Read more
 -
 Arduino Piano Project
10/23/20173062 viewsThis is a piano board with eight push button switches that allows you to play one octave (Do Re Mi Fa So La Si Do)...Read more
 -
 Small AC to DC Converter
03/16/20183300 viewsThe small AC to DC Voltage Converter project uses four diodes to make one bridge rectifier to transfer AC power to DC...Read more
 -
 RF Remote Control Car
03/09/20174123 viewsThe RC car is a great project for all ages and it doesn’t require any programming. It uses simple integrated circuits...Read more


.png)
