

location_on 4131 Fraser St. Vancouver BC Get Directions
phone 604-875-1993 Call us
access_time Hours
| Monday - Friday | 9AM - 5:30PM |
| Saturday - Sunday & Holidays | Closed | See Holiday Hours |


When the remote control button is pressed, the output of D0, D1, D2, and D3 is high level, and when it is not pressed, it is low level.
Product parameters:
Working voltage: DC3.3~5V
Quiescent current: less than 5mA
Operating frequency: 315MHz
Receive sensitivity: -108dB
Receiving distance: more than 45 meters
Frequency band: ±0.2MHz
Working temperature: -25~75
Working mode: jog, self-locking, interlocking
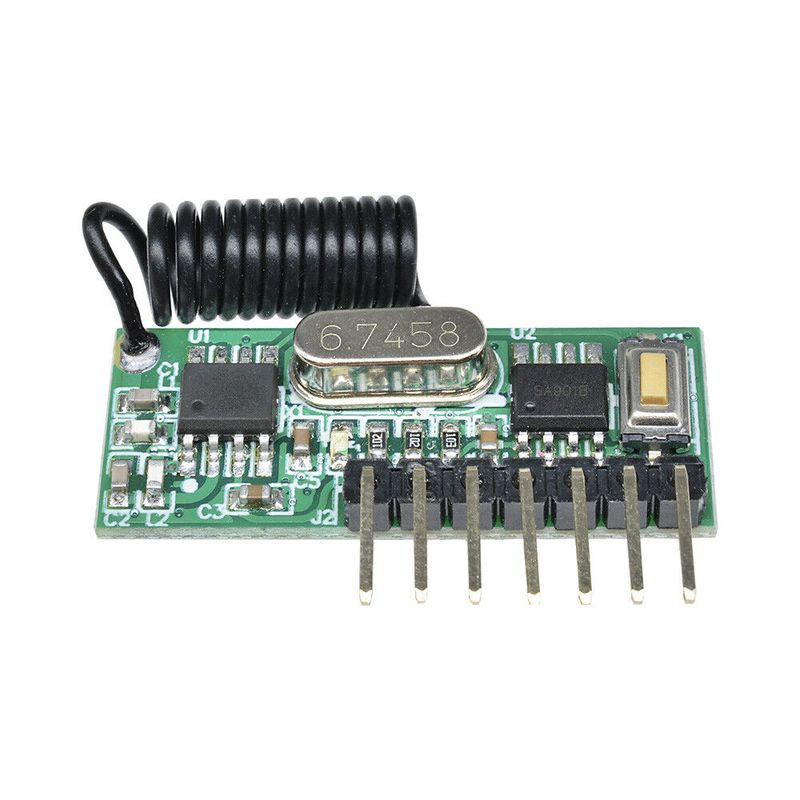
Output: 4-way CMOS level signal corresponding to 4 buttons of remote control ABCD
Pin Commands:
GND: ground or negative
+ V: DC3.3~5V input
D0: data output
D1: data output
D2: data output
D3: Data output
VT: LED and learn button output
Clearing and code matching: ( Before switching modes, you must clear the code first )
1. Clear function - after pressing the learning button "KEY" 8 times, the LED indicator light goes out and then lets go, starting to clear all remote control code data in the memory. When the LED indicator light flashes 7 times and then goes out, the clearing function is completed.
2. Code matching function - press the learning button (jog mode) "KEY", the LED indicator lights up, indicating that the microprocessor enters the code learning state, press the matching wireless remote control button, the LED indicator light flashes 3 If it goes out after several times, it means the code matching is successful. ( Press the learning button once for jogging mode; press it twice for self-locking mode; press it 3 times for interlocking mode; press it 4 times : jog mode 1 and 2, self-locking mode 3 and 4; press it 5 times: 1 , No. 2 jog, No. 3, 4 interlock; press 6 times: No. 1, 2 self-locks, No. 3, 4 interlock; Press 7 times; No. 1, 2 interlock, No. 3, 4 interlock. ) The wireless remote control switch can store 16 different remote controls and can set different working modes. (This is a one-click code matching, the program will automatically allocate the data bits)
3. Code pairing test - after the code is successfully matched, when you press the remote control button, the corresponding D0, D1, D2, and D3 outputs are high level.
Wiring and testing
1. Correctly standardize the wiring according to the control functions you need. After the wiring is completed, check again whether the wiring is correct. Please do not perform wiring operations or attempted wiring while the power is on.
2. After confirming that the wiring is correct, turn on the power.
3. Press the coded remote control button, and the remote control switch controls the corresponding control object. If the control object is controlled normally, it means that the wiring test is successful and it can be used normally.
Common Problems
1. When the power is turned on, the code can be cleared and matched at any time. When the circuit is working, the code clearing function is performed. After the code is cleared successfully, the 4-way relay returns to normal. During the code binding function, after the LED indicator lights up, it enters the code binding state. The learning waiting time is about 16 seconds. Code binding needs to be completed within these 16 seconds. After 16 seconds, the LED indicator light goes out and the program automatically exits the code binding state.
2. When using it for the first time, be sure to clear the code once and clear the factory test stored remote control code. After the code is successfully paired, the valid remote control code LED indicator light will light up.
3. The control switch can store 16 remote control codes. If 17 remote control codes are learned, the program will automatically overflow the first remote control code and become invalid. And so on. When the remote control codes are confused, they should be cleared before learning to avoid interference from other remote control codes.
4. The remote control used needs to be coded and learned, because the general coded remote control is not coded when it leaves the factory. It is okay to take it and learn to use it directly, but it will be controlled by other remote controls without code.
5. When using and installing, try to avoid interference sources and environments similar to shielding covers. It will directly affect the receiving sensitivity.
6. Do not use it abnormally. Abnormal use will reduce the performance and life of the product. In serious cases, it will directly damage the product and bring hidden dangers to your safety.
" VT " On the receiver what is used for ?
The VT pin has 2 functions: 1, Using VT to control the LED as an Indicator, when any pin D0-D3 signal output, VT have a signal output at the same time. 2, Using VT and +V can replace the button function on the receiver. (Note:The VT terminal is active when a signal is received, i.e. if any of the 4 channels is "turned on" the VT line is "turned on".) The picture shows as follows:

